There's a particular type of frustration that anyone who's set up GTM Server-Side in production knows intimately.
The Google documentation walks you through provisioning the server in about ten clicks. It looks simple. You spin up the server, you preview a few events, you see them flowing, you feel confident. Then you try to actually use it for something — route Meta CAPI events with proper user data parameters, handle a custom event from your e-commerce platform, manage consent state for EU users, debug why one event type isn't firing — and you realize the easy part is over.
The documentation is comprehensive but scattered. Solutions to specific problems exist across Google's official docs, Simo Ahava's blog, the Stape knowledge base, half a dozen Medium posts of varying quality, and Stack Overflow threads that may or may not still apply to the current version. Half of what you'll need to know isn't documented anywhere in one place.
This post is my attempt to put it in one place, at least for the parts that matter most for production deployments. What I'm writing here is the guide I wish someone had handed me the first time I implemented GTM Server-Side for a real Bangladeshi client running real ad traffic. It's the configuration choices that actually matter, the operational details that bite you in production, and the cost optimization techniques that keep your monthly Google Cloud bill from doubling unexpectedly.
This builds on the Conversion API Setup Across All Major Platforms post I published recently. If you haven't read that and you're new to server-side tracking generally, start there for the conceptual foundation. This post assumes you understand why server-side tracking matters and focuses on the implementation specifics for Google Tag Manager Server-Side specifically.
Fair warning before we go further: this is the most developer-focused post I've published. If you're a brand owner or non-technical marketer, this isn't for you — send it to whoever actually implements your tracking stack. They'll thank you for it.
What GTM Server-Side actually is, briefly
Standard Google Tag Manager (the "web" container) runs in the user's browser. JavaScript loads from googletagmanager.com, tags fire client-side, events get sent directly from the user's browser to wherever they're going.
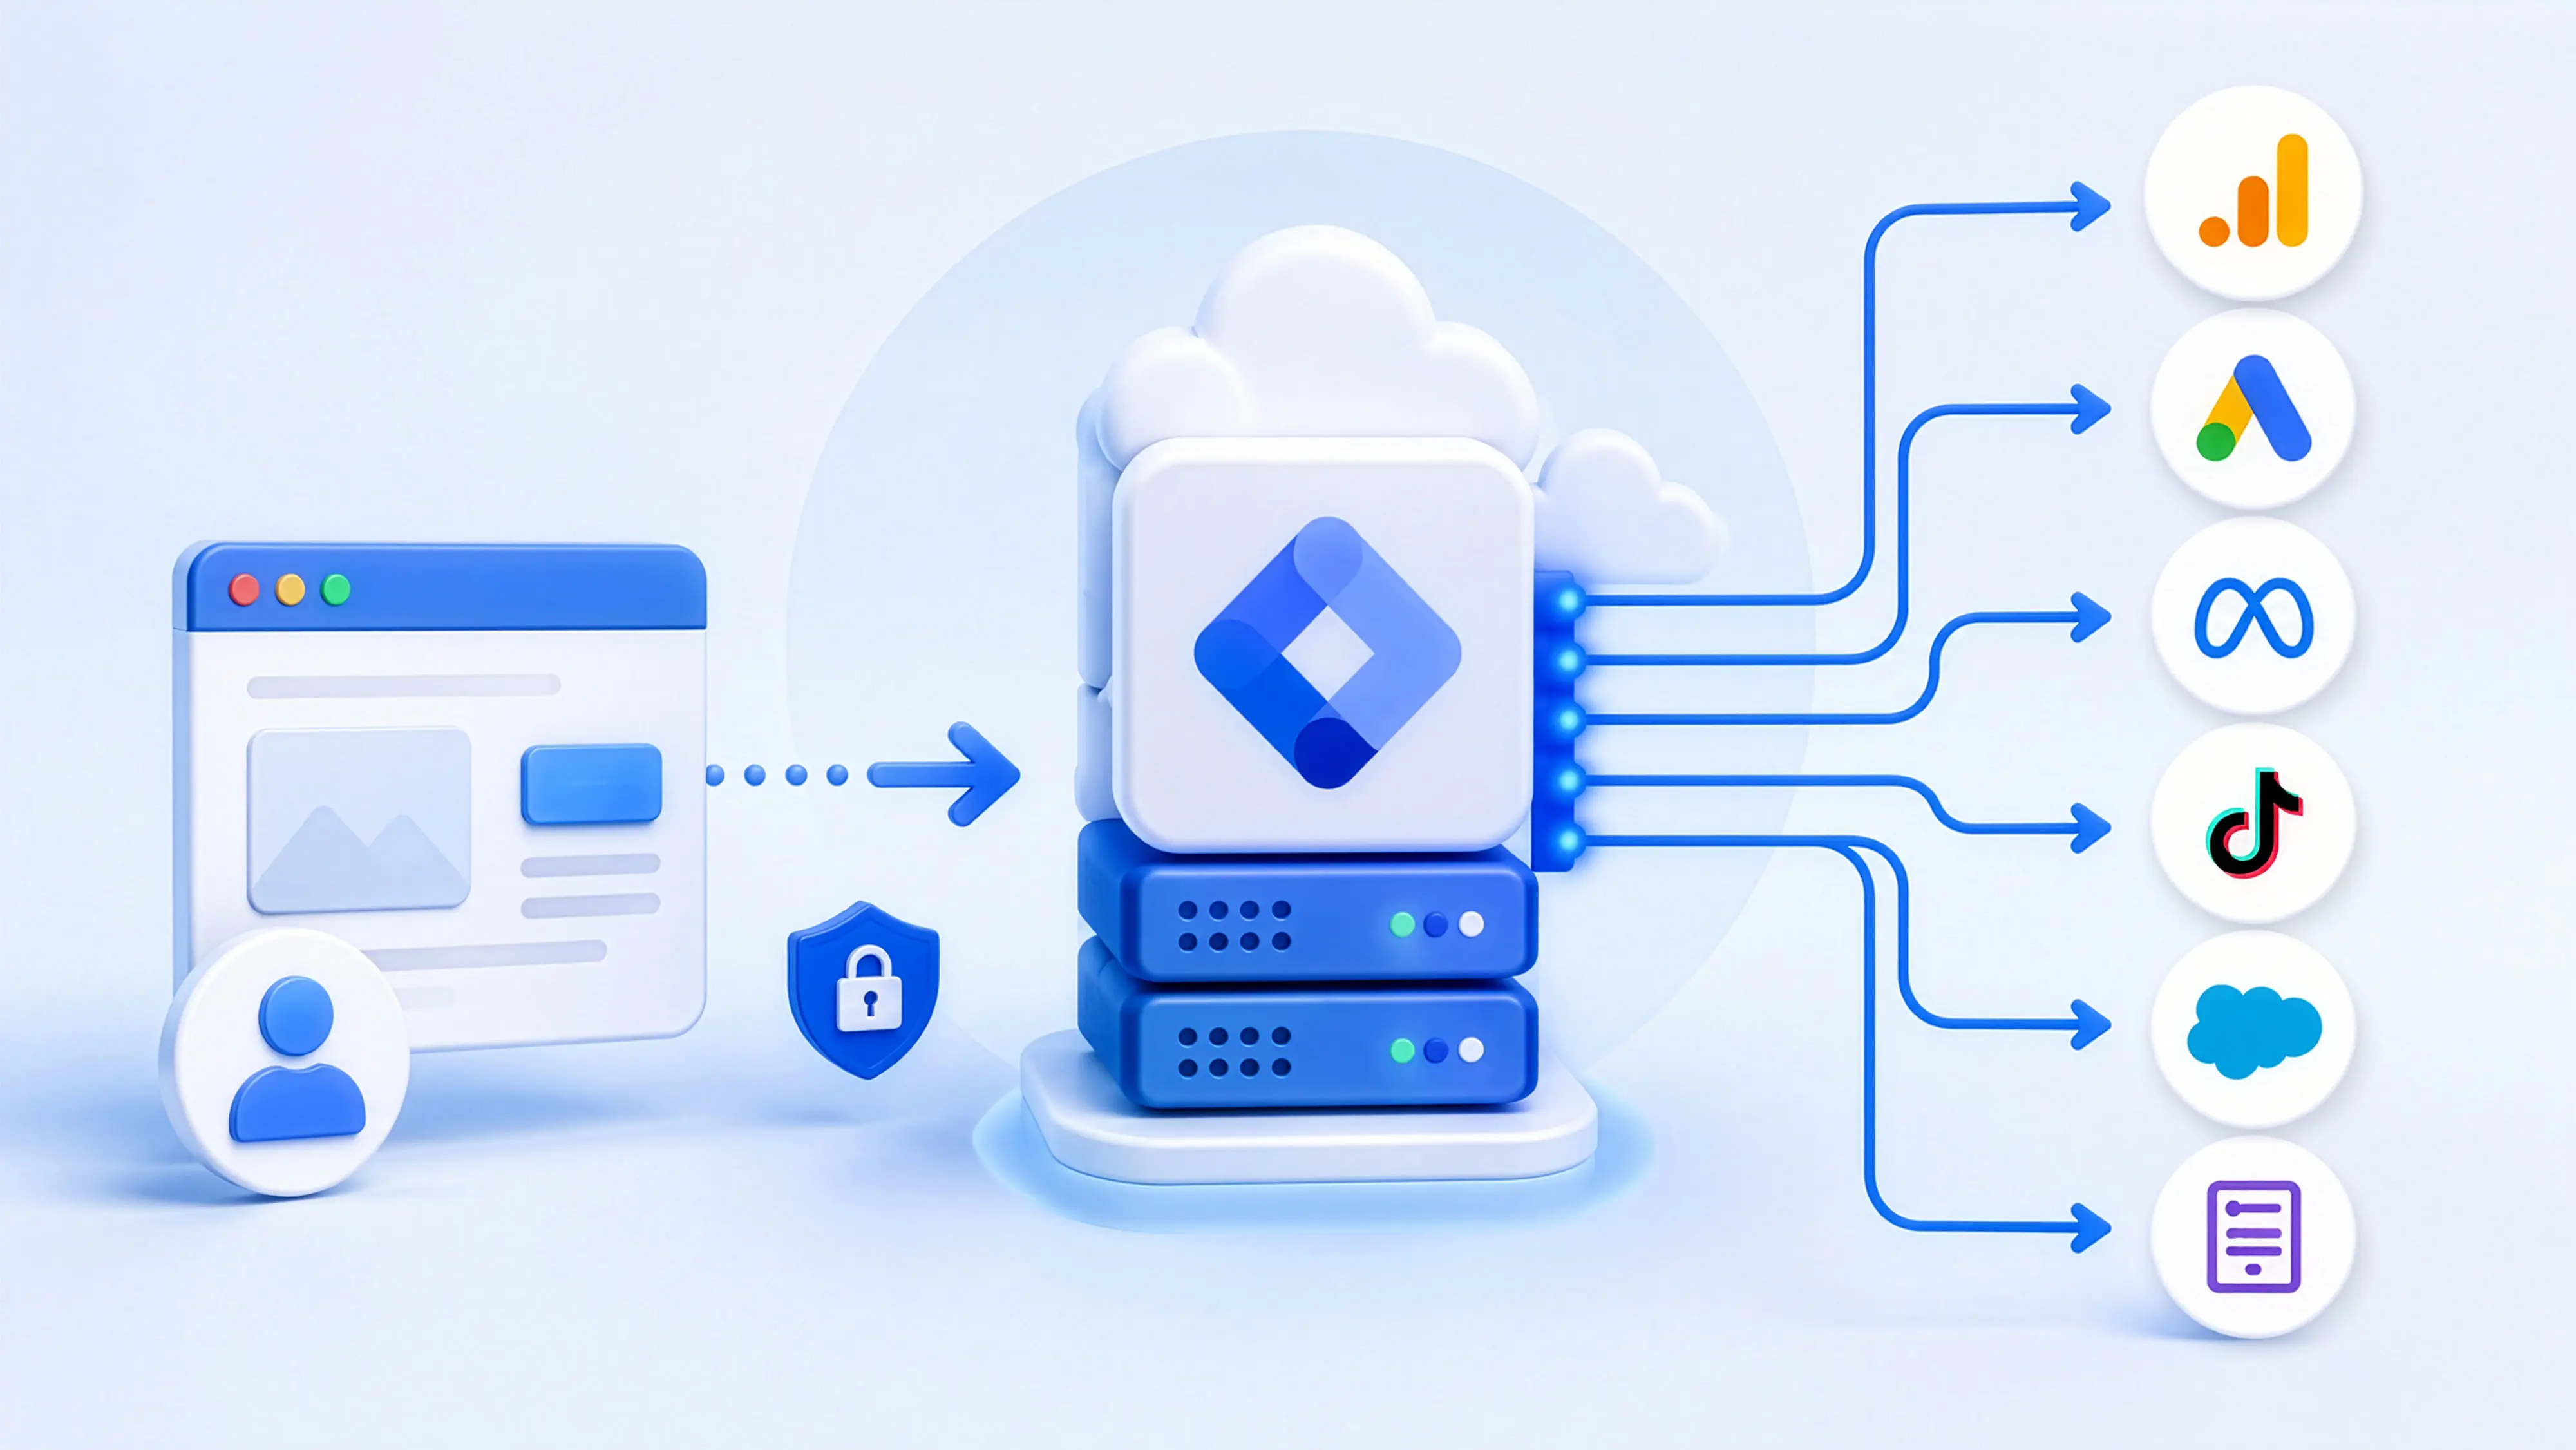
GTM Server-Side adds a second container that runs on your own server infrastructure. Events from your browser-side GTM (or directly from your application) get sent to this server-side container, which then processes the events and forwards them to destinations — Meta CAPI, Google Ads, GA4, TikTok, wherever.
The architectural shift this enables is significant. You can hash personal data on your server before sending it to ad platforms (better security and privacy posture). You can route events to multiple destinations from a single inbound event (eliminating the multiple direct integrations problem). You can serve tracking scripts from your own domain via reverse proxy (improving load times and reducing ad blocker impact). You can enrich events with server-side data your browser couldn't access. You can manage consent decisions centrally rather than implementing them per-tag.
For a Bangladeshi e-commerce or lead generation operation running ads across multiple platforms, GTM Server-Side is the right architecture for most use cases. The cost is modest. The implementation is achievable. The benefits compound over months and years as platform tracking continues to fragment.
What it isn't: a magic fix for poor browser tracking. If your browser-side events are firing with bad data, server-side won't clean that up. The server processes whatever events arrive — garbage in, garbage out. The implementation only delivers value when paired with disciplined browser-side event design.
The infrastructure decision: Google Cloud Run vs. alternatives
Google's official deployment path for GTM Server-Side uses Google Cloud Run, but it's not the only option. Let's get this decision out of the way before going into setup detail.
Google Cloud Run (Google's official path)
You deploy GTM Server-Side as a container image on Cloud Run, Google's serverless container platform. The infrastructure auto-scales based on traffic. You're billed for compute time when requests are actively processing.
Pros: officially supported by Google, automatic scaling, no infrastructure management, integrates cleanly with the GTM admin interface.
Cons: cost can be unpredictable at scale, cold start latency on low-traffic periods, requires Google Cloud account setup and billing configuration.
Cost ballpark for typical Bangladeshi e-commerce traffic (50,000-200,000 monthly events): $40-150/month with proper configuration. I'll cover cost optimization specifically later because most implementations spend 2-3x more than necessary due to default configurations.
Stape, SGTM Cloud, and other managed providers
Several third-party services provide hosted GTM Server-Side environments. You pay a monthly fee, they handle the infrastructure. Stape is the most prominent in this category.
Pros: easier setup for non-DevOps developers, predictable monthly pricing, additional features beyond what Google Cloud offers (Power-Ups, transformations), customer support.
Cons: ongoing cost is generally higher than self-hosted Cloud Run for moderate-to-high traffic, you're locked into the provider's environment, less control over infrastructure decisions.
Cost ballpark: $20-100/month for typical traffic depending on provider and tier.
Self-hosted on AWS, Azure, or DigitalOcean
Possible but not officially supported. You build a container running the GTM Server-Side image and deploy it yourself.
Pros: maximum control, potentially lowest cost at scale, useful if you're already on AWS/Azure/DigitalOcean and want to keep infrastructure unified.
Cons: not officially supported, requires substantial DevOps work, you handle all scaling and reliability, updates aren't automatic.
I don't recommend this path for most teams. The complexity savings of Cloud Run or Stape are worth the marginal cost.
My default recommendation for Bangladeshi clients
For most operations: Google Cloud Run with the cost optimizations I'll cover later. For teams without DevOps capacity or comfort with Google Cloud: Stape. For very large operations (millions of monthly events) where cost optimization matters more than convenience: self-hosted Cloud Run with manual scaling configuration.
The rest of this guide assumes Google Cloud Run. If you're using Stape or similar, most of the GTM container configuration translates directly — only the infrastructure provisioning section is provider-specific.
Provisioning the Cloud Run server
The official guide walks through this, but there are choices you'll be asked to make that aren't obviously consequential until later. Let me cover what to choose and why.
Step 1: Google Cloud project setup
Create a dedicated Google Cloud project for your GTM Server-Side deployment. Don't reuse a project handling other workloads. Isolation makes cost tracking easier, security cleaner, and accidents less catastrophic.
Naming convention I use: {client-name}-sgtm-prod. Production deployments live here. Create a separate -staging project if you'll do extensive testing without affecting production data.
Enable billing on the project. You'll need a billing account associated. New Google Cloud accounts get $300 in free credits for the first 90 days, which is more than enough to cover initial deployment and testing.
Enable the required APIs: Cloud Run API, Cloud Build API, Container Registry API. The GTM provisioning script will prompt for these but pre-enabling avoids interruptions.
Step 2: Container deployment
From the GTM web interface, create a new Server container. GTM gives you a configuration string that includes your container ID. You'll paste this into Google Cloud's deployment process.
The deployment uses a script Google provides. From Cloud Shell (the browser-based shell in Google Cloud Console), you run a command like:
bash -c "$(curl -fsSL https://googletagmanager.com/static/serverjs/setup.sh)"
The script prompts you for configuration. The choices that matter:
Region: pick a region close to your users. For Bangladeshi traffic, asia-south1 (Mumbai) or asia-southeast1 (Singapore) are the right choices. Mumbai typically gives lower latency for Bangladesh users. Don't default to us-central1 even though Google's documentation often uses it in examples — the latency penalty for Bangladesh users is significant.
Container deployment type: choose "Production setup" for production environments. This deploys both the primary tagging server and a separate preview server. The preview server is essential for debugging without affecting production data.
Minimum number of servers: this is the critical cost decision. Google's default suggestion is to set minimum instances to a non-zero number (often 3) to avoid cold starts. This means you're paying for those instances 24/7 whether they're processing requests or not. For most Bangladeshi operations, I set this to 1 or even 0 for development environments. More on this in the cost optimization section.
Maximum number of servers: set this generously. The default of 6 is fine for most operations. Cloud Run only spins up instances as needed, so a higher max doesn't increase baseline cost — it just allows scaling during traffic spikes. If you're running Black Friday-scale promotions, set it to 12 or higher.
The deployment script handles container image building, Cloud Run service creation, and initial configuration. Total time: 10-15 minutes.
Step 3: Custom domain configuration
This is where most setups stop short and shouldn't.
The default Cloud Run URL for your tagging server looks something like https://your-container-name-xxx.a.run.app. Technically functional. Practically problematic for two reasons: ad blockers recognize *.run.app patterns and may block requests, and routing your tracking through a Google-owned domain provides less privacy benefit than self-hosting suggests.
The right configuration: map a subdomain of your own domain to the Cloud Run service. Something like events.yourdomain.com or sgtm.yourdomain.com. This requires:
DNS configuration: add a CNAME record at your DNS provider pointing the chosen subdomain to ghs.googlehosted.com.
Cloud Run domain mapping: in Google Cloud Console, under Cloud Run, select your tagging server service and add a custom domain. Google handles SSL certificate provisioning automatically through Let's Encrypt.
Verification: this can take 24-48 hours for SSL certificate provisioning. Don't try to use the custom domain before the certificate is active.
Once configured, update your GTM Server container's URL setting to the custom domain. All your browser-side tracking will then send to the subdomain you own, which appears in network requests as part of your site's domain rather than as a third-party tracking domain.
This single configuration step recovers a measurable percentage of ad blocker losses for most Bangladeshi sites — typically 5-15% of events that would otherwise be blocked.
Step 4: Preview server configuration
The preview server is a separate Cloud Run service that handles preview mode events (the debug events you see when you enable Preview in the GTM interface). It needs its own subdomain if you want to use preview mode with your custom domain.
Configure something like preview-events.yourdomain.com pointing to the preview server. Add this URL to your GTM Server container's URL list under Container Settings.
Skipping this means preview mode won't work cleanly when you have custom domain configured for the production server. Most setups forget this step and then waste time debugging why preview mode shows nothing.
The Client configuration: where signals come in
GTM Server-Side's architecture has three main concepts: Clients, which receive incoming HTTP requests and convert them into events; Tags, which fire events to destinations; and Variables, which extract data from events for tag configuration.
Clients are the most underexplained piece of the system. Get the Clients right and everything else falls into place. Get them wrong and you'll fight the system for weeks.
The default Clients you'll see
A freshly provisioned GTM Server container comes with several default Clients:
Universal Analytics: receives Universal Analytics hits. Useless in 2026 since UA is deprecated, but it's still there. Delete it.
Google Analytics: GA4: receives GA4 events sent via the standard GA4 client SDK. This is critical and should remain.
Google Tag Manager: Web Container: receives events sent from a web-based GTM container configured to send to your server. This is the most common Client for typical e-commerce setups.
Measurement Protocol: receives events sent directly via GA4 Measurement Protocol API calls. Useful for server-to-server event sending.
The architectural question: where do events originate?
Before adding Tags, you need to know how events will arrive at your server container. There are four common patterns:
Pattern A: Web GTM forwards to Server GTM. Your site has a Web GTM container that captures browser events, and that Web container has a single tag (the "Google Tag" with server_container_url parameter) that forwards events to your Server container.
Pattern B: Direct gtag.js to Server. Your site uses Google's gtag.js library directly (no Web GTM), configured to send events to your Server container's domain.
Pattern C: Custom application-level events. Your application code sends events directly to the Server container via HTTP POST. Used for server-side events that browsers can't see — webhooks from payment processors, CRM events, etc.
Pattern D: Mixed — Patterns A and C used in combination. Browser events go through Web GTM to Server. Server-originated events come direct from application code.
Pattern D is what production deployments typically use. The Web GTM layer handles browser events; the application-level event sending handles things browsers can't observe (subscription renewals, customer service-driven actions, backend purchase confirmations).
For each pattern, you need a Client configured to receive those events. Pattern A and B use the GA4 or Web Container Clients. Pattern C requires either the Measurement Protocol Client or a Custom Client you build.
Building a Custom Client for application-level events
Most non-trivial deployments need at least one Custom Client. Custom Clients are JavaScript code that runs in the Server container, processing incoming HTTP requests and turning them into events that tags can act on.
A simple Custom Client for receiving JSON-formatted application events looks roughly like this in concept:
// Claim requests to a specific path
const requestPath = getRequestPath();
if (requestPath !== '/app-events') {
return;
}
claimRequest();
// Parse the incoming JSON body
const eventData = JSON.parse(getRequestBody());
// Convert to GTM event format
const event = {
event_name: eventData.event_type,
user_id: eventData.user_id,
// ... other event parameters
value: eventData.value,
currency: eventData.currency
};
// Run the event through the container
runContainer(event, () => {
setResponseStatus(200);
setResponseBody(JSON.stringify({status: 'success'}));
returnResponse();
});
This is the conceptual structure. The actual Sandboxed JavaScript implementation requires specific GTM Server-Side APIs that don't match standard JavaScript exactly. The official documentation on Sandboxed JavaScript is essential reading before writing real Custom Clients.
Where Custom Clients trip people up: the Sandboxed JavaScript is a restricted environment with specific permitted APIs. Standard libraries don't work. async/await syntax doesn't work in older runtimes. Error handling needs explicit consideration because uncaught exceptions can hang the request.
For most Bangladeshi deployments, you can avoid writing complex Custom Clients by routing application events through the GA4 Measurement Protocol or by using the built-in Web Container Client. Custom Clients become necessary primarily when integrating with systems that send proprietary event formats — certain enterprise CRMs, custom internal applications, or webhook providers that don't follow GA4 conventions.
The Tag configuration: where events go out
Once Clients are receiving events properly, Tags determine where those events flow. This is the part most documentation focuses on, so I'll keep it brief and focus on production-relevant details rather than re-explaining the basics.
Meta CAPI tag configuration
There are two routes for Meta CAPI from GTM Server-Side.
Route one: the official Meta Conversions API tag template, available in the GTM template gallery. Search for "Conversions API Tag for Facebook" or similar. Install it into your Server container's templates.
Route two: a custom HTTP request tag that calls Meta's Graph API directly. Used when you need behavior the template doesn't support.
For most operations, the template is fine. Configuration requires:
The Pixel ID (from Events Manager). The access token (generated in Events Manager under Settings). Event configuration: mapping incoming events to Meta standard event names (Purchase, Lead, AddToCart, etc.). User data parameter mapping: which fields from the incoming event become which Meta CAPI user_data parameters.
The user data parameter mapping is where most implementations leak value. The tag template will let you map any incoming variable to any Meta user_data field, but it's your responsibility to populate every available field. Typical insufficient configuration:
em (email): {{Event - email}}
ph (phone): {{Event - phone}}
client_ip_address: {{Client IP}}
client_user_agent: {{Client User Agent}}
This works but is leaving match quality on the table. Add:
fn (first name): {{Event - first_name}}
ln (last name): {{Event - last_name}}
ct (city): {{Event - city}}
country: {{Event - country}}
zp (zip): {{Event - postal_code}}
fbp: {{Event - fbp}}
fbc: {{Event - fbc}}
external_id: {{Event - user_id}}
The template handles hashing for parameters that require it (em, ph, fn, ln, ct, zp). Don't pre-hash these or you'll double-hash.
For Meta CAPI specifically, also enable: test event code (during testing), action source set appropriately (website for web events), opt_out parameter wired to your consent state variable.
GA4 tag configuration
GA4 server-side tagging works differently from Meta. The "GA4" tag in GTM Server-Side doesn't send events to Google Analytics — it processes them within the server container ecosystem. The actual sending happens via the Google Analytics: GA4 Client when events arrive.
The practical implication: if your events arrive via the GA4 Client (events sent from browser gtag.js or Web GTM), they automatically flow to GA4 unless you actively suppress them. You don't need a "GA4 send" tag in your Server container.
If your events arrive via Custom Client or other non-GA4 channels and you want them in GA4, you need a GA4 tag that constructs and sends events. Configure this tag with your Measurement ID and the event parameters to forward.
Google Ads conversion tag configuration
Google Ads conversions via server-side go through one of two approaches:
Standard conversion tag: a "Google Ads Conversion Tracking" tag template that sends conversion events to Google Ads. Configure with your conversion ID and conversion label from the Google Ads conversion action setup.
Enhanced Conversions augmentation: if you've enabled Enhanced Conversions for your Google Ads conversion actions, the server-side tag can include user data (email, phone, name, address) that augments the conversion's match rate. The tag template supports passing this data; you map incoming event fields to the appropriate user data parameters.
Pre-hashing or letting Google hash: Google's tag template can hash on your behalf if you pass unhashed data, but I recommend pre-hashing for security (your server holds plaintext PII for less time) and for parity with how Meta CAPI handles the same data.
TikTok Events API tag
Available as a template in the gallery, typically named "TikTok Events API." Configuration:
Pixel ID (from TikTok Ads Manager). Access token (from Events Manager). Event name mapping (use TikTok standard names like CompletePayment, not custom names). User data mapping similar to Meta CAPI. Test event code during testing.
TikTok's tag template is slightly less mature than Meta's. Test more thoroughly before going live.
The pattern across platforms
Each ad platform has its own tag template with platform-specific configuration. The pattern is consistent: incoming event → mapped to platform's event taxonomy → user data parameters populated from event variables → platform-specific authentication → fire the event.
The work of "implementing Meta CAPI in GTM Server-Side" reduces to configuring one tag correctly. The work of "implementing CAPI across Meta, Google, TikTok, LinkedIn, Snap" is configuring five tags. The Client and Variable layer underneath them is shared.
This is the architectural payoff of GTM Server-Side. The duplicated work disappears.
Variables: the often-overlooked infrastructure
Variables in GTM Server-Side extract data from incoming events for use in tag configuration. Default variables cover obvious cases — Client IP, Client User Agent, Event Name. Custom variables become necessary for any non-trivial implementation.
Event Data variables
Most variables you'll create are "Event Data" variables that extract a specific key from the incoming event. If your event includes user_data.email, you create an Event Data variable with key path user_data.email. Name it sensibly — I use the convention Event - email, Event - phone, Event - first_name so they group together alphabetically in the variable picker.
Request Header variables
Useful for extracting data from the HTTP request itself. Common cases: getting the original referrer the browser sent, extracting authentication headers if your custom events use them, capturing geolocation hints from Cloudflare or similar CDN headers.
Cookie variables
Cookie values from the incoming request. Used for capturing fbp, fbc, ttclid, and similar ad-platform identifiers that browser pixels set and forward via server-side events.
Lookup table and Regex Table variables
For mapping one set of values to another. Example: your application sends event names like order_completed but Meta expects Purchase. A Lookup Table variable handles this mapping cleanly.
The hashing variable pattern
When sending hashed user data to platforms that require pre-hashed values, you need variables that take a raw input and produce a hashed output. GTM Server-Side has a built-in sha256Sync function for this in Sandboxed JavaScript.
Build a Custom JavaScript variable that takes an input variable, normalizes it (lowercase, trim, strip formatting), and returns the SHA-256 hash. Use this variable wherever a hashed value is required.
Don't try to hash inside the tag configuration directly. Centralizing hashing in variables means: hash logic is consistent across all tags, normalization rules apply uniformly, debugging hash mismatches happens in one place.
A common variable architecture for an e-commerce deployment:
Event - email (raw, from event data)
Event - email (hashed) (normalized + SHA-256 of above)
Event - phone (raw)
Event - phone (hashed)
Event - first_name (raw)
Event - first_name (hashed)
... and so on
Then in tag configurations, you reference the hashed variant. Clean separation of concerns; obvious in the variable list which variables contain PII and which contain hashes.
Triggers and consent management
Triggers in GTM Server-Side determine which events fire which tags. The trigger logic for server-side is conceptually simpler than for web — you're typically matching on event names rather than the complex DOM-based conditions web GTM uses.
Standard trigger pattern: "Some Events" matching on Event Name equals Purchase for a tag that fires Purchase events to Meta.
Consent handling
This is where most server-side implementations fall short, and it's the part with the most legal sensitivity in 2026.
Browser consent management platforms (Cookiebot, OneTrust, Usercentrics, etc.) provide consent decisions to the browser-side GTM. When a user opts out of marketing tracking, the browser-side GTM should:
Suppress browser-side ad pixels for that user.
Pass the consent state to the server-side container so server-side tags don't fire either.
Most implementations handle item 1 and forget item 2. The result: users who opted out of marketing tracking still have their server-side events firing to Meta, Google, and TikTok. This is a consent violation that creates real legal exposure for international audiences and increasingly for Bangladeshi audiences as data protection law develops.
The correct implementation:
Browser-side GTM reads consent state from the consent management platform.
When forwarding events to server-side, browser-side GTM includes the consent state in the event payload (typically as a parameter like consent_ad_storage and consent_analytics_storage).
Server-side GTM has triggers on ad tags that check the consent variable: only fire if Event - consent_ad_storage equals granted.
Test scenarios for users who:
Granted all consent: all tags fire correctly.
Denied marketing consent: ad platform tags don't fire, analytics-only tags do.
Denied all consent: no tags fire.
A common implementation pattern is a "Consent State" trigger group that checks consent and is referenced by all marketing-related tags as a prerequisite. Centralizing this logic prevents per-tag mistakes.
Cost optimization: making this affordable
Google Cloud Run bills based on three resources: CPU time, memory allocation, and request count. For GTM Server-Side, the cost drivers most teams ignore become substantial at moderate scale.
The minimum instances trap
The official setup guide recommends setting minimum instances to 3 to avoid cold starts. This means three Cloud Run instances run continuously, even when there's no traffic. At typical configurations, three minimum instances cost roughly $90-120/month at baseline before any traffic charges.
For most Bangladeshi operations, this is overkill. Cold start latency for GTM Server-Side is in the 300-800ms range, which matters for synchronous tag firing but typically doesn't matter for tracking events. Tracking events are fire-and-forget from the user's perspective — the user doesn't wait for them.
My standard recommendation: set minimum instances to 1 for production, 0 for staging. This reduces baseline cost by 60-70% with negligible operational impact for most use cases.
Exception: if you're running real-time conversion-dependent workflows (instant ad bid optimization, real-time personalization based on server-side decisions), keep minimum instances higher. For standard analytics and conversion tracking, 1 is sufficient.
Memory and CPU configuration
Default Cloud Run configuration for GTM Server-Side allocates more resources than typical workloads need. The default settings work fine for high-traffic operations but waste money for moderate traffic.
For traffic under 100,000 events per day: 1 CPU and 1GB memory is sufficient.
For 100,000-500,000 events per day: 1 CPU and 2GB memory.
For higher volumes: scale up based on observed performance.
Cloud Run lets you configure these in the service settings. Lower configurations charge less per request. The savings compound at scale.
Request optimization
Each HTTP request to your GTM Server-Side instance costs money. Reducing requests reduces cost.
Strategies:
Batch events at the browser side when possible. Sending one request with 5 events is cheaper than 5 separate requests.
Avoid frequent low-value events. Server-side firing of every page view at high traffic volumes adds up. Consider whether page view events need server-side processing or whether browser-side GA4 is sufficient.
Disable preview mode on production. Preview servers process additional debug data and run continuously when active. Disable preview mode access for production users.
Monitoring and alerting
Set up Google Cloud billing alerts. Configure alerts at $50, $100, and $200 monthly spend so unexpected cost spikes don't go unnoticed.
In Cloud Run, the Metrics dashboard shows request counts, instance counts, and resource utilization. Review monthly. Anomalies usually indicate either a deployment problem (instances stuck running when they shouldn't be) or an event firing problem (something looping or firing far more than expected).
Typical monthly costs at different scales
For Bangladeshi context, these are the cost ranges I see for production GTM Server-Side deployments after optimization:
Small operation, 20,000-50,000 events/month: $30-50/month Medium operation, 100,000-300,000 events/month: $50-100/month Large operation, 500,000-1,000,000 events/month: $100-200/month Enterprise scale, 1M+ events/month: $200-500/month
Without optimization, these costs typically run 2-3x higher. The optimization work is worth doing.
Debugging when things break
GTM Server-Side production debugging is harder than browser-side debugging because you can't easily see what's happening from a user's perspective. Several tools and techniques make this manageable.
Preview mode
Enable Preview in the GTM Server-Side interface. This activates the preview server, which captures detailed information about each event flowing through. Browse the events tab to see incoming requests, the Variables tab to see resolved variable values for a specific event, the Tags tab to see which tags fired and why.
Preview mode is essential during development and useful for production debugging when investigating specific user reports. Disable preview when not needed to reduce baseline cost.
Cloud Run logs
Each request to your GTM Server-Side instance generates Cloud Run logs. View these in Google Cloud Console under Cloud Run > your service > Logs.
For routine debugging, the GTM preview interface is easier. For deep debugging — investigating tag failures, custom client issues, performance problems — Cloud Run logs are the source of truth.
Test event tools at each platform
Meta's Test Events tab, Google's Conversion Diagnostics, TikTok's Events Manager test events — each platform has tooling for verifying that events arrive correctly. Use these alongside GTM preview to verify end-to-end flow.
Common production failures
Tags firing but events not appearing in destination platforms. Almost always an authentication issue. Verify access tokens haven't expired (Meta tokens can be configured to expire) and verify the credentials in tag configuration match what's currently valid.
Event data appearing in some tags but not others. Variable resolution problem. Open preview mode for a specific event and verify each variable resolves to the expected value. Variables that resolve to undefined or empty strings typically indicate missing event data from the source.
Sudden cost spikes. Usually one of: misconfigured trigger causing tags to fire on every event when they shouldn't, custom client with an infinite loop, runaway scaling due to traffic spike combined with high max instances. Cloud Run metrics dashboard identifies which is happening.
Cold start latency complaints. If users or downstream systems are experiencing latency on first requests after idle periods, increase minimum instances. The cost increase is usually small compared to the operational pain of unpredictable latency.
Preview mode showing events but production not receiving them. Check that preview server URL and production server URL are configured separately and correctly. Confusion between these is a frequent source of "it works in preview, doesn't work in production" issues.
Operational maintenance over time
GTM Server-Side isn't a deploy-and-forget system. The ongoing maintenance is light but non-zero, and skipping it is what separates implementations that compound value over years from implementations that quietly degrade.
Monthly checks I recommend
Review Cloud Run costs against expectations. Investigate any deviation over 20% from baseline.
Verify Event Match Quality scores in Meta Events Manager. EMQ scores can drift downward if your application stops sending certain user data parameters due to upstream changes you didn't notice.
Check destination platform diagnostics. Meta, Google, TikTok all surface warnings and errors in their Events managers. Don't let these accumulate unreviewed.
Review trigger logic for any new platform features. Platforms periodically add new event parameters, new user data fields, new optimization options. Ensure your container configuration captures relevant updates.
Quarterly checks
Audit tag configurations against current platform best practices. Documentation changes; recommended configurations evolve. Quarterly review keeps configurations current.
Review custom client code for any deprecated APIs. GTM Server-Side updates Sandboxed JavaScript runtimes occasionally. Code that worked in old runtimes can break.
Verify SSL certificate renewals for custom domains. Google handles these automatically but verify they actually renewed.
Cost optimization review. Traffic patterns change over months; configuration optimal for last quarter's traffic may not be optimal now.
Annual checks
Container template updates. Tag templates in the gallery get updated; ensure you're running current versions where possible (after testing).
Comprehensive security review of access controls. Who has access to your Server container? Have any developers left without access being revoked?
Architecture review. Was last year's architecture decision still right? Have new platforms launched that you should add? Has any platform been deprecated that you should remove?
A production-ready deployment checklist
If you're implementing GTM Server-Side for a real deployment, the following checklist captures what "done" looks like:
Cloud Run service provisioned with appropriate region, minimum instances configured for cost optimization, custom domain mapped with SSL certificate active.
Preview server deployed and accessible via separate subdomain.
Web GTM container configured to forward events to Server container.
All required Clients enabled in Server container (typically GA4 Client + Web Container Client at minimum).
User data variables configured with proper hashing for parameters that require it.
Consent state variables configured and referenced by all marketing tags.
Meta CAPI tag configured with comprehensive user data parameter mapping, target Event Match Quality of 8.0+ verified.
Google Ads tag configured with Enhanced Conversions enabled, verified in Conversion Diagnostics.
GA4 events flowing correctly, verified in GA4 DebugView and standard reporting.
TikTok Events API tag configured if applicable, verified in TikTok Events Manager.
Additional platform tags (LinkedIn, Snap, Pinterest) configured as needed.
Test events validated through each platform's testing interface before production activation.
Cost monitoring and billing alerts configured.
Documentation written: tag inventory, variable inventory, consent logic, custom client code if any.
Knowledge transfer completed to whoever will maintain the deployment.
Without all of these, the implementation isn't done — it's stalled mid-deployment in a way that will cause problems later.
What this actually delivers when done right
A properly configured GTM Server-Side deployment provides:
Conversion event capture rates 25-50% higher than browser-only tracking for Bangladeshi audiences, with higher gains for iOS-heavy audiences.
Match quality scores in destination platforms 30-60% higher than typical browser-based implementations, enabling significantly better ad platform optimization.
Centralized control over what data flows to which platforms, including the ability to honor user consent decisions properly.
Reduced exposure to browser-level ad blocking, with 5-15% additional event capture for sites where ad blocking is significant.
Foundation for advanced use cases: custom audience syncing, server-side personalization, application event integration, CRM data forwarding to ad platforms.
Lower per-platform implementation cost compared to building independent integrations for each ad platform.
The cumulative impact on campaign performance for a brand running BDT 30+ lakh monthly in paid ads typically shows up as 15-30% improvement in attributed conversion volume and corresponding CPA reduction over a 60-90 day window post-implementation. The payback period on the implementation effort and ongoing infrastructure cost is usually under 60 days.
This isn't a hypothetical claim. It's the consistent pattern we've observed across multiple Facebook Ads, Google Ads, and TikTok Ads campaigns at Ngital where proper server-side tagging replaced earlier inadequate implementations. The tracking infrastructure is invisible to anyone looking at campaigns from outside, but its quality determines whether campaign optimization actually works or just appears to work.
If you're a developer or technical marketer implementing this for the first time, expect 60-120 hours of work across all phases — provisioning, configuration, testing, debugging, production stabilization. That's substantial effort but the work is straightforward when done methodically. The post above captures most of what makes the difference between an implementation that delivers value and one that becomes another half-finished project.
For agencies considering offering server-side tagging as a service, the operational work scales well after the first 2-3 implementations. The patterns become repeatable. The configurations transfer between similar clients. The recurring infrastructure makes it a viable productized service offering.
For brand owners deciding whether to invest: the question isn't whether server-side tagging is worth doing. It's whether you're willing to do it right. Half-implemented server-side tagging produces marginal benefit and substantial ongoing cost. Properly implemented server-side tagging compounds advantages indefinitely. There isn't really a middle ground that works.